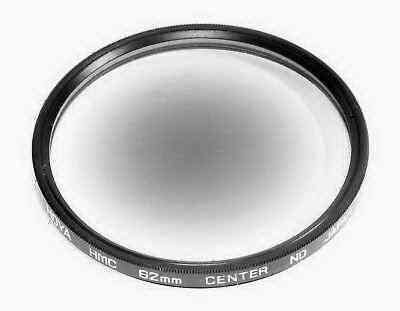
What are CENTER neutral density (CND) filters?
All lenses have an angle of coverage, or angle of view, or perspective. It's simply how much a lens "sees", and different people use different terms, phrases and words -- sometimes incorrectly -- to refer to this. I'm not talking about the focal length of a lens, although in some ways it is similar, and related. Some lenses "see" only a little and some "see" a lot. A 100mm lens can have a very narrow angle of view (and will be a telephoto lens), while another 100mm lens can have a very wide angle of coverage (and will be a wide-angle lens) -- even though they both have a focal length of 100mm. So keep in mind that "focal length" and "angle of coverage" are two separate constructs -- just distantly related.
As the angle of coverage INCREASES, TWO very important
things happen:
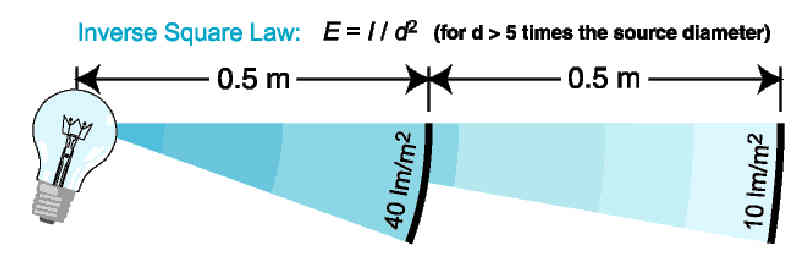
Without "Going Mathematical", some photographers might refer to this as "The Inverse Square Law":
Others might say, "Oh yes, the Cosine4 Law":
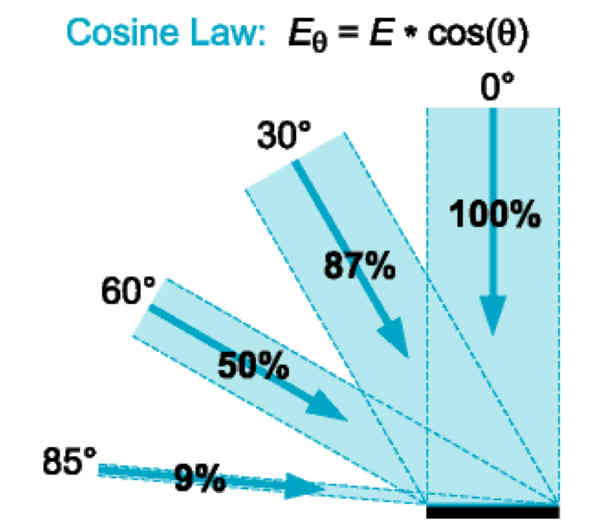
Six of one, half dozen of the other. They are all talking about the same phenomenon. It's just that one is speaking Latin, and the other Greek. But there is no need for you to even think about these formulas or use math! The ONLY point to remember is that light QUICKLY diminishes the farther it travels. Think of your electronic flash and how fast the light drops off with the distance to the subject.
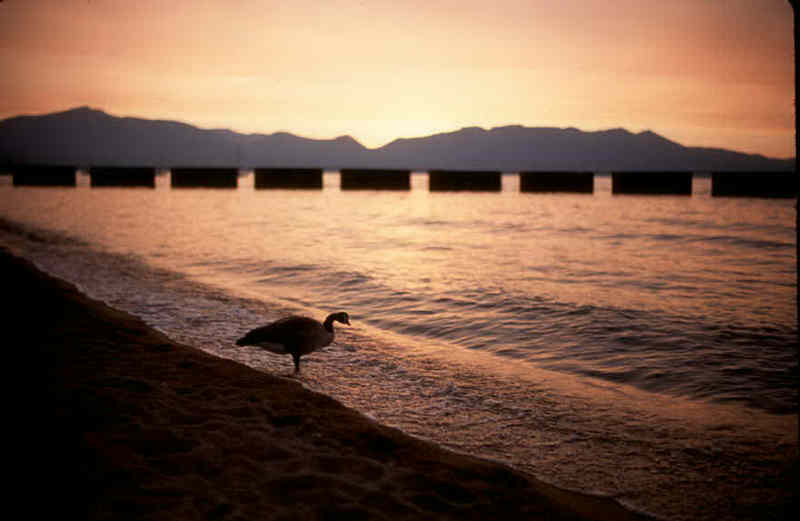
Here are a couple of shots that show what CAN happen to the corners and edges of the photo when a lens with a wide angle of view is used. The first is with a wide-angle lens on standard 4x5 film camera:
Here is a wide-angle lens on 120 film in a panoramic camera:
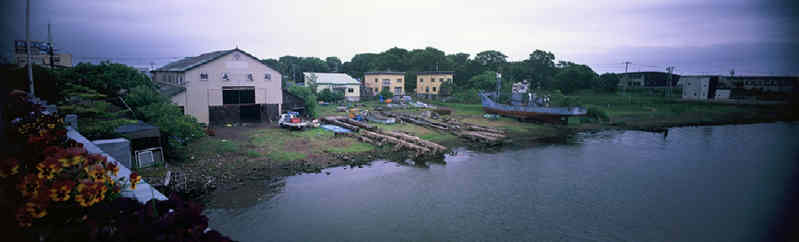
Notice that the corners get GRADUALLY darker, and because the right and left edges are further away from the lens axis, that they are darker than the top and bottom edges -- again GRADUALLY. Some people don't mind the darkening of the edges, and others even prefer it. And some even increase the effect in the darkroom by dodging or burning the image. Eugene Smith did exactly this when he created his famous photograph "Trip to Paradise Garden".

If you fall into any of these "I like dark corners" categories, you can stop reading the rest of this page because you don't have to concern yourself with using central neutral density filters.
Plus, you'll save yourself a lot of money!
But if you would prefer lighter corners and edges -- however you define "lighter" -- then continue reading. Keep in mind that you can ALWAYS darken them later if you want.
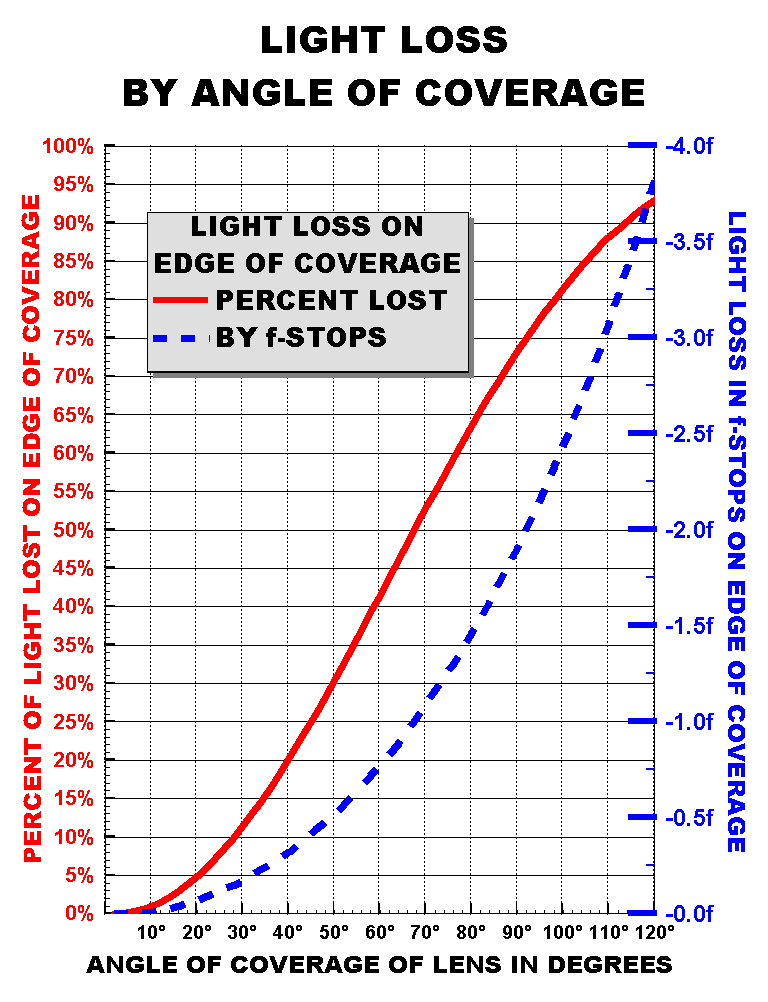
Here is a graph showing how much light is lost on the edge of the film/sensor based on the angle of coverage of the lens. On the left is the percentage of light lost, and on the right is the light loss converted into f-stops -- these are completely different ways of measuring light loss and are displayed together on this graph only to save space.
Let's look at a couple of examples.
A lens with a 45° angle of view -- similar to the human eye's perspective, regardless of the film format -- loses about 25% of its illumination on the edge of the image circle. That's about 1/3rd of a f-stop of light. No big deal. It is hardly noticeable -- so no correction is really warranted.
But a lens with a wider angle of coverage, such as 75° -- similar to a 28mm lens in the 35mm format -- loses about 55-60% of its illumination at the edge. That's 1 1/4th f-stops of light lost. That is much more significant. And if you go even wider, the problem is quickly magnified.
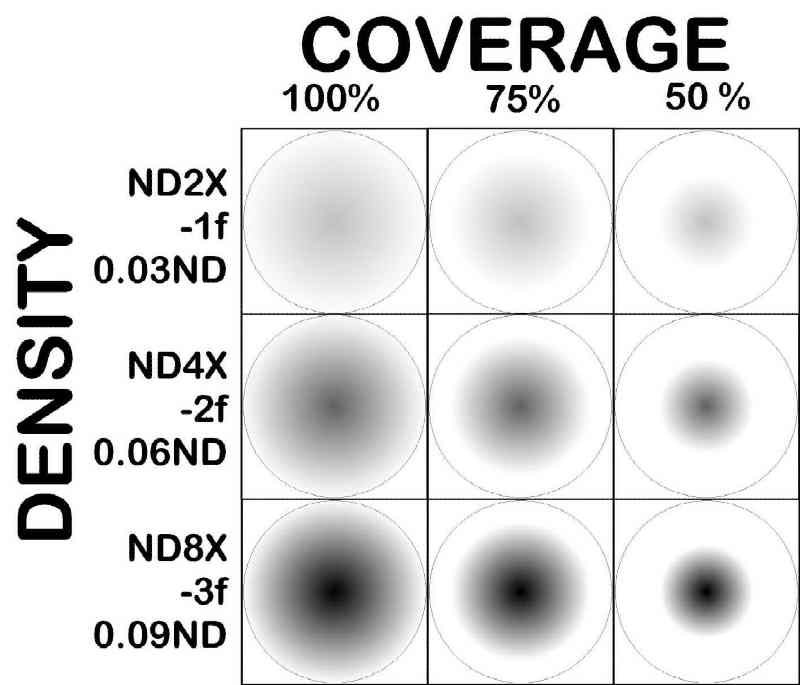
This is where CND (Center Neutral Density) filters come into play. They allow all the light on the edges of the lens to pass through the lens, but they GRADUALLY diminish the light in the center of the lens -- just like a typical neutral density filter. It can be 1, 2 or even 3 f-stops of light loss intensity. So, if your CND filter is a 2X (AKA 0.3) filter, it decreases the amount of light in the middle of the scene by 1 f-stop. You increase the exposure by 1 f-stop or shutter speed in order to compensate for the light loss in the middle of the scene -- but the edge of the film/sensor gets the correct amount of light.
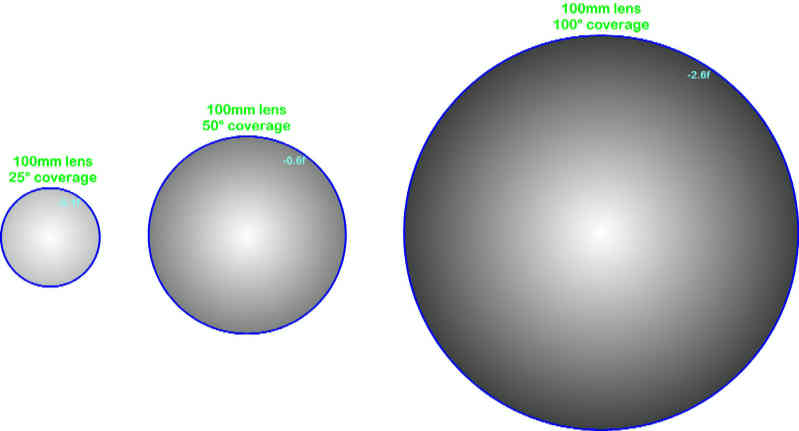
Below are representations of light passing through three 100mm lenses with different amounts of coverage from 25° to 100°. These are all 100mm lenses. The difference is the angle of coverage. The smaller the angle of coverage, the smaller the image circle produced by the lens. The important thing to notice is that while the center of each disk are equally as bright, as the angle of coverage of the lens increases, the amount of light on the edge drops off -- dramatically. For the 100mm lens with a 25° coverage, the edge is only -0.1 f-stops darker than the center, while the 100mm lens with 100° coverage shows a substantial -2.6 f-stop drop-off.
Center Neutral Density (CND) filters were developed to counteract this
phenomenon. They are darker in the center and clear on the edge so more light
passes through to the edge and less to the center. Just like other Neutral
Density filters, they come in different densities, but they also vary in
the coverage of the lens perspective. And just like the use of regular neutral
density filters where the exposure is adjusted according to the density of
the filter (typically with a longer shutter speed), with CND filters, the
exposure also must be adjusted by lengthening the exposure time. In this
way the edges of the image receive the correct amount of light through clear
glass, and the center receives less light -- with a corrected exposure
time.
The exposure compensation for a CND filter can mean increasing the exposure
by 1, 2, or 3 shutter speeds, depending on the filter, the scene and your
taste. And just as with a normal, neutral density filter, while the manufacturer
might offer a recommended
exposure adjustment, you can choose whatever works for your lens and approach.
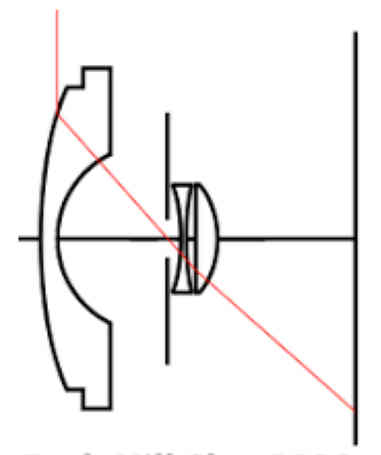
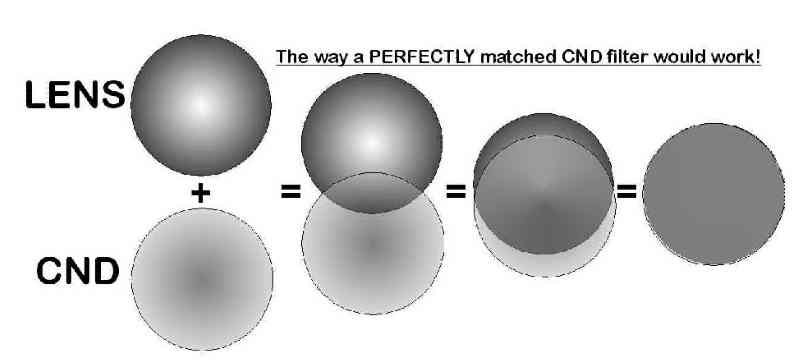
Here's how a lens and CND would work in a perfect world:
COPYRIGHT@1995-2019 by Joe McGloin.
All Rights Reserved.
The material on this website is protected by US Federal copyright laws and
cannot be copied or used in any manner without specific approval from the
owner.