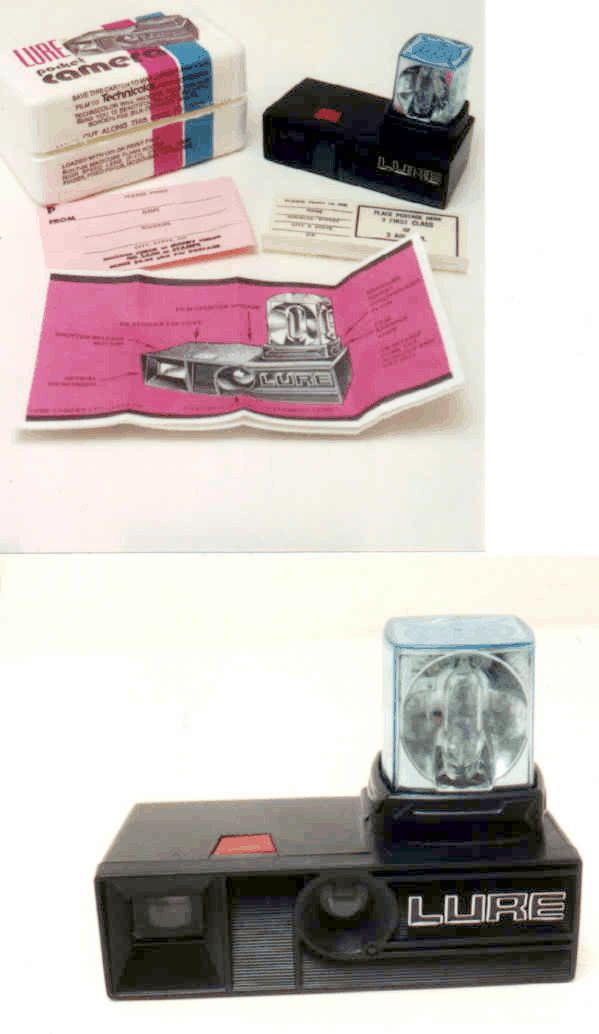
RELOADING LURE CAMERAS
The Lure does not use cassettes. Perhaps it would be more accurate
to say that the cassette is built into the camera. It was designed
as a "disposable" camera that was returned to the factory. It can be
reloaded if you have patience.
-
Memorize these instructions since you can't refer to them in the dark; better
yet, run through the steps with the lights on with scrap film.
-
Gather all your items together -- 16mm film, scissors, and film template.
-
Wash your hands thoroughly, or use film gloves (obtainable at most camera
shops) in order to avoid getting oil or dirt on the film.
-
The front and back of the camera -- the camera shell around the "guts" --
is held onto the "guts" with plastic tabs. The front has two tabs and
the rear has only one. To get the camera apart, you need to squeeze
your finger tips into the seam along the front of the camera while pulling
the back away from you. It takes quite a bit of pressure to accomplish
this. You can use a screw-drive or other implement but you'll end up
chipping the plastic. Part of the difficulty is that you have to do
this in dim light -- so as not to expose the film in the camera. The
front and back pieces tend to stick -- even though they are not glued --
and there is no way of knowing what will come off first -- or at all. And
when they do come apart, they come apart quickly with pieces flying across
the room. But to change the film, you have to get the back off -- at
least.
-
Once the front and/or back is wiggled and pulled off, remove any loose items
for later reuse. You need to make sure you don't lose any of
the pieces that might fall out. The pieces that are most likely to
come off are the viewfinder glass (front and read), the shutter release,
the front lens element, and the film-feeder-chamber cover. A little
bit of glue will keep these in place in the future -- don't glue the
film-feeder-chamber cover.
-
Next, if the "guts" of the camera it still attached to the front of the camera,
try it undo it. This will take some tugging and twisting, but nothing
is glued. Once again, "watch" for loose pieces to fall off. The
most likely items are two shutter release items on the bottom. So hold
the camera upside down when pulling out the "guts". If you can't get
the front to detach, it's still possible to load the camera.
-
Turn the lights off and remove the film that's in the camera by pulling up
on the film advance knob. It's one sealed unit with a slot for the
film. If the front of the camera is still attached, you need to bend
the advance knob backward, but the plastic is pliable and will not break.
Also remove the cover on the film feeder compartment -- a little
plastic disc.
-
Unwind the film and paper backing and place the film in a light-tight container
for later processing. Be careful not to pull the paper too far or fast
-- it's attached to the film advance knob on one end. If it tears or
separates, reattach it with some tape.
-
Cut a 16.25" length of film, using a template, ruler or whatever you can
device. A yardstick with a notch or piece of tape at 16.25" will work fine.
(The Lure is designed to use ISO 40 film, but you'll get the best results
with a film in the ISO 100 range. And although any type of 16mm film,
regardless of perforations, will work, you will get image cut-off with perforated
film.)
-
The film is a litle shorter than the paper backing, so that when they are
rolled up together they will fit. First attach the film to the take-up
spool with some of the tape that attached the paper backing. Then match
up the end of the film and the end of the paper backing. Wind the film
and paper tighly into a roll starting at the end. Make sure that the emulsion
in wound in toward the center of the roll.
-
Slip the film roll into the feeder compartment of the camera. TEMPORARILY
attach a piece of tape over the cover so that it does not fall off.
-
You can turn on a dim light at this point.
-
Feed the film around the film plane and drop the film advance mechanism back
into its compartment. If the front of the camera is still attached
to the "guts", this is the hard part. You've got to pry up the two
tabs on top of the spool chamber and slide the tabs into the slots on the
film advance knob. The slot on the advance knob is just below the arrows
on the sides of the knob. It helps if you have three hands and/or a
screwdriver. Just be patient and keep trying. You'll get it.
-
Take the tape off of the feeder compartment.
-
Press the front of the camera back on (if it is detached). Make sure
all of the parts are in the right place.
-
Press the back of the camera back on . Make sure all of the parts are
in the right place.
-
Make sure the shutter mechanisms are set correctly (carefully turn the film
advance knob and release the shutter to make sure everything works). If
not you, get to take it apart and start all over.
Not the easiest camera in the world to reload, but if you can do it, you'll
be the only one on your block using a Lure! P.S. That little clear
window/tab on the front of the camera? It exposes a little dot
on the bottom of each exposure. It's not important to you. Maybe
it was used by the manufacturer's processing. So if you loose that
tab, it's no big deal.
If you have any ideas, suggestions or comments about these pages, please
contact the Sub Club at the FRONT
DESK. To return to the main index
for the Sub Club click here.
To return to the main index
for the Sub Club click here.
COPYRIGHT @ 1995, 1996, 1997, 1998, 1999, 2000, 2001, 2002, 2003, 2004, 2005 by Joe McGloin. All Rights Reserved.