Using Pin holes
on a large format camera
If you want to get really SOFT results in your pictures, there are all sorts of approaches that you can use, such as the numerous soft-focus, diffuser, texture screens and fog filters, as well as using movement, rotation, zooming or changing focus (during the exposure), and vaseline on the lens (wherever and how much you want) -- either on the camera lens or on the enlarger lens (using a spare filter, I hope).
One favored approach that is often overlooked is the pin-hole camera or lens. You can't really call it a camera because it isn't -- even though that is sometimes how it is advertised or sold. But you can't call it a lens either, because no lens is involved and they are not made by any major manufacturers. They are merely tiny, "needle" or "pin" holes in paper, plastic or metal. They have great depth of field due to their tiny apertures, but the edges of the image are always fuzzy. The further away from the center of the image, the softer the image becomes -- just as with real soft-focus lenses. Similarly, there will be light fall-off and that too will increase the farther away from the center of the image.
Different people describe the results differently -- such as romantic, soft-focus, ethereal, classic, old-timey, dreamy, misty, funny, mesmerizing, fuzzy, foggy, psychedelic, historical, hysterical, other-worldly, pictorial, out-of-focus, dizzying, mind-boggling, etc. Some people love them and can't get enough; others hate them with a passion. I'll leave that part up to you.
Here are three websites where you can see some of the amazing results obtainable if you turn your large format camera into a pinhole camera:
https://www.pinholeresource.com/
http://econtent.unm.edu/cdm/landingpage/collection/pinhole
And here is an OLD Pinhole discussion FORUM with lots of helpful info:
http://www.f295.org/main/forum.php
The best pinholes are laser-made pinholes in small, very thin metal sheets because these have very clean edges -- but these are also the most expensive. They come in a variety of "focal lengths", just like real lenses. And they normally don't come in easy-to-use, common mounts, attachments or adapters. They are just pinholes in some sort of material. I'll let you figure out how to attach them to your camera. And if you want to use filters -- and you can -- you will need to figure out how to attach them, as well. Here's how I did it.
My pinholes are:
Here is a table of the f-stop breakdown starting at f1 in full, half, and third f-stops -- up to f4000 or so.
So, on a sunny day, which normally calls for f16 (at the reciprocal of the film speed as the shutter speed),
with a 300mm pinhole (about f500) you will need about 250 times as much light. With ISO 125 speed film that's
about an eight second exposure -- or about 30 seconds after reciprocity failure adjustment. It, of course
will be even longer with slower film, darker settings, filtration adjustment and/or compensation for close-up bellows
extension. So be prepared for long exposures -- a steady tripod, lots to eat and drink, a comfortable chair
and a good, locking cable release. And NEVER forget to adjust your exposure and development for reciprocity rule failure after extension
and filtration is added!
As you can see, the apertures are tiny and they are not adjustable. Other companies make pinholes of other
focal lengths -- or you can make them yourself, but you will have to figure out the f-stop and the focal length.
Either way, you have to attach them to your camera -- somehow. I know of no photographic meter that reads to f455,
so bring a calculator or piece of paper. With pinhole cameras the focusing is not fixed. These are just estimates
to get the overall sharpest results. So, for example, with a 75mm pinhole, create 75mm of extension on your camera
between the pinhole and the film. You will need a tape measure. This will, of course, give you the best possible
picture at infinity, but with the incredible depth-of-field it should cover all distances well. You can focus closer,
but you will need to adjust the time accordingly and focus on the ground glass carefully -- if you can! You can
focus pinholes at any distance, but getting a usable image on the ground glass is not easy -- the best place to
check the ground glass is right in the middle. In all cases you will need a very good ground glass cover. People
will think you are a complete idiot, but you will get great results. My Toko's maximum bellows length is 360mm
so I can't go any longer than that (without some modification) but I like the wider-angle pinhole shots anyway.
It's just something to keep in mind when searching for pinholes. With most 4x5 cameras you will not have a problem
-- other than attaching the pinholes to the shutter.
The focal lengths and f-stops listed above are for my particular pin-holes AT INFINITY. They can be used
at closer distances, of coarse, with or without changing the focus, but for the sharpest results when focusing
closer, it is best to adjust for the change in the f-stop and an increase in the exposure time as a result. The
closer you want to focus, the more change will be needed, just as with a regular lens. If you find yourself
wanting to focus closer than infinity often, it would behoove you to made a simple graph for each pinhole indicating
the subject distance and the f-stop. From that you can calculate the exposure time given the ambient light.
Here is an example:
My pinholes are attached by using a Leica (39mm) thread, metal lens cap. First, a hole (about 1/4") is drilled in the center of the lens cap and then the pinhole is taped to the rear of the lens cap so that the pinhole is in the middle of the 1/4" hole. Then they are simply screwed into a standard 39mm enlarging lens lock ring that has been glued to a standard Copal #1 lensboard for my camera.
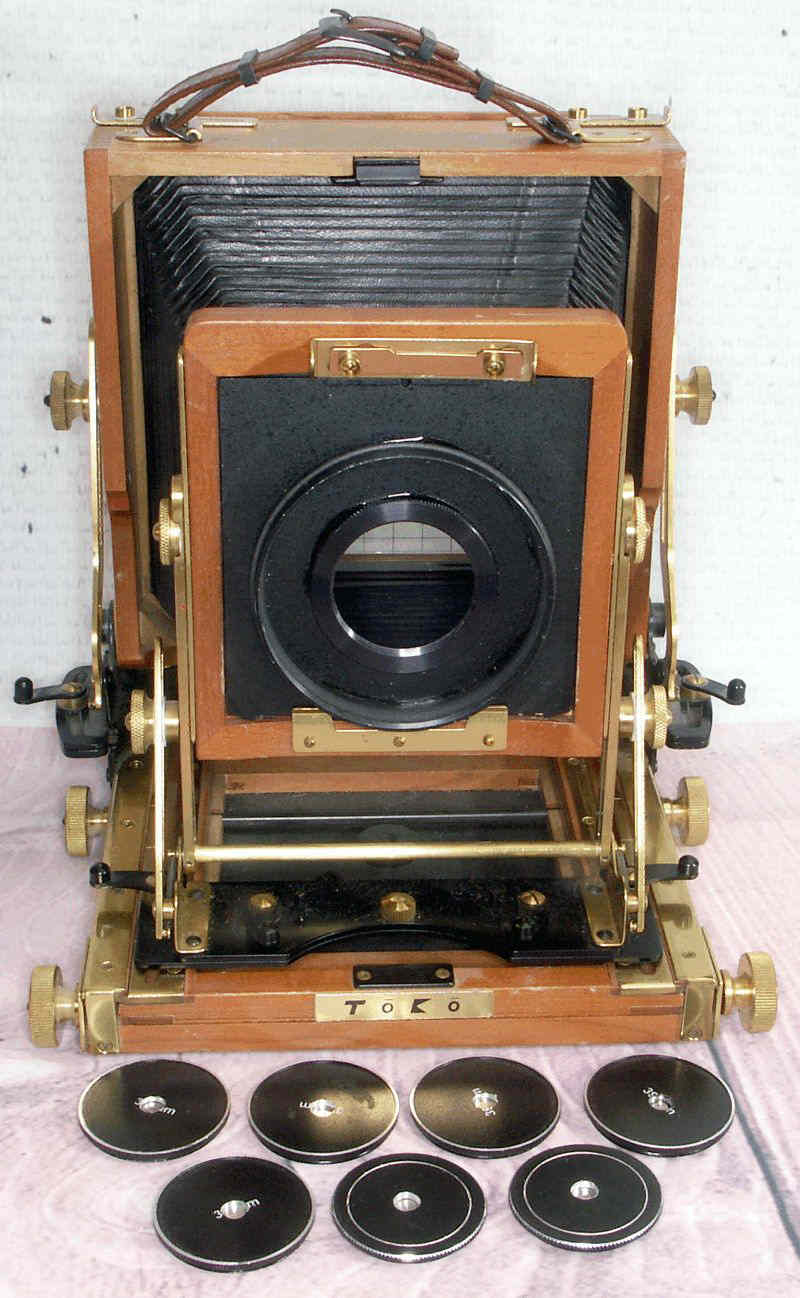
The Copal #1 shutter has been removed, of course. This makes using them pretty easy. Chances are, one of your large lens shutters is a Copal #1. With other shutters you will need a different adapter(s).
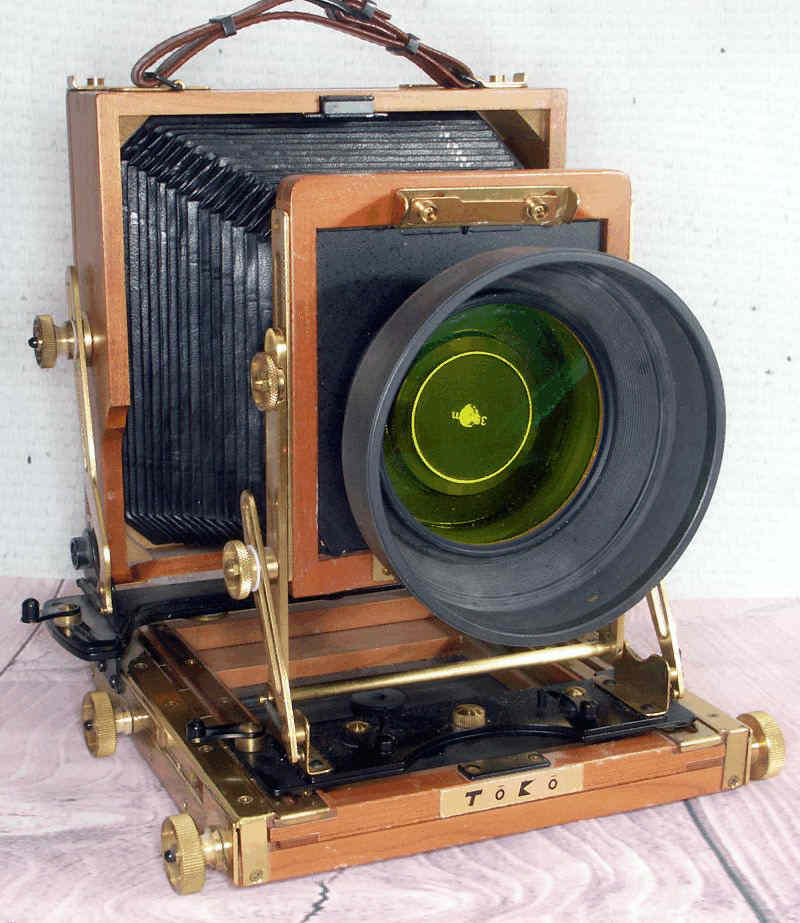
I also glued on a 77mm filter ring around the enlarging lens lock ring so that filters and lens shades
can be used.
Here is a website to help you calculate the f-stop of your pin-hole(s) and the focal length(s) that will produce the optimal (i.e., sharpest) results. Even though the font size and color scheme makes it nearly impossible to read, it is worth the effort:
PINHOLEDESIGNER 2.0
PinholeDesigner is a program for Windows and is aimed at making the calculations for designing and using pinhole
cameras easier. Amongst its main features are calculations for the optimal diameter of the pinhole and the exposure
times for pinhole cameras.
There's also:
http://www.mrpinhole.com/index.php
And if you find that website too frustrating, here is a simpler, easier approach.
And here is a great place that sells pinholes, singly or in sets. It's where I got my set -- for under $50!
https://www.pinholeresource.com/
Then there are variations on the simple pinhole that gives you even more flexibility in the soft-focus realm. Think of this as a variable area or zone that lies between the true soft-focus lenses (where you can vary the softness from high to low by both adjusting the f-stop and by inserting different disks into the lens) and simple, pin-hole lenses. It's too lengthy to explain it all here, so I'll give you two resources. The first is a website from SKINK, a German company which makes a wide variety of pin-hole and pin-hole derived "lenses". Some of their products are designed for large format cameras, some are easily adaptered (see below), while others might require some home-made ingenuity.
Here is a very nice independent review of the Skink "system" with plenty of example shots. To see more photos just do a GOOGLE seach for SKINK and select the IMAGES tab.
http://lensgarden.com/light/skink-is-a-cool-way-to-pinhole/
![]()