
DOING YOUR OWN REPAIR WORK
Repairing the Steky III
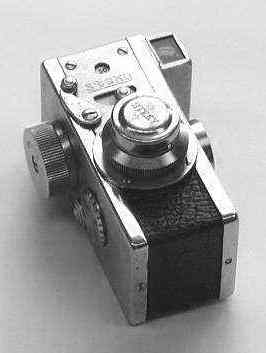
The Steky III is a really neat little camera. It is incredibly simple to disassemble, work on and reassemble. There are no unseen pitfalls or other hazards. Once you get past the fact that you have to peel off the paper fake leather covering, you are half way there.
All you need to know about the Steky family of cameras is to be found in various places in the Subclub. Go to the following addresses:
Info on the cameras -- http://www.subclub.org/shop/steky.htm
Info on reloading the cameras -- http://www.subclub.org/darkroom/rollstek.htm
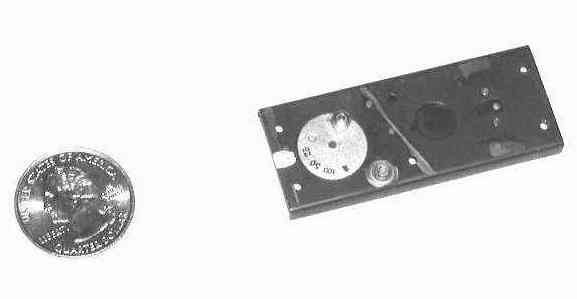
These sites tell you all about the various models and how to reload the cassettes. It is easier to do in fact than to read about it. I was successful the first time I tried. All the various sub-assemblies are "units" and parts don't go flying about when you remove the different assemblies from the camera. One interesting thing I found was that there is a 3/8 inch hole in the back, in line with the lens. On my camera there was a ½ inch thin brass circle glued over the hole. This leads to two possible conclusions. One, maybe there was somewhere in the dark past a version that used paper backed and numbered film like the HIT cameras and there was a red window there. Or two, it was a hole through which to check shutter time. My personal belief is number one, because the shutter could have been more easily tested when the shutter assembly was out of the camera, before assembly.
Taking the Steky apart:
1. Unscrew the lens from its mounting ring (CCW or anti-clockwise for our British friends).
2. Peel off the fake leather, which is glued in place. Most likely it is so brittle it will need to be replaced. More on that later.
3. Remove the 4 tiny (1.5mm) screws holding the lens ring in place. Keep these screws with the ring with a piece of tape.
4. Remove the 2 screws holding the side plate with the winder knob (1 each end).
5. Pull off the winder knob side plate. It pulls straight off.
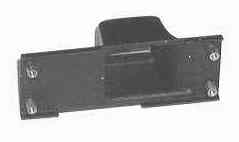
6. Remove 2 screws holding the film plane pressure plate. One is on the end of the camera and the other is on the back of the camera about in the middle.
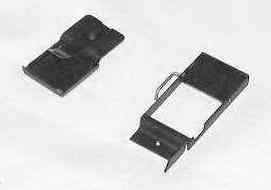
7. Pull out the pressure plate assembly. Note that it is in two parts. One is the housing and the other is the pressure plate itself with a leaf spring attached.
8. Remove the 2 chrome-plated screws from the front of the camera on the shutter speed window. This will release the shutter speed window part from the camera body. Slide it toward the top of the camera to remove.
9. Remove the screw from the shutter trip lever and carefully remove the lever. Put the screw back on ASAP after step 10, so the TINY shaft doesn't fall through and out the back of the shutter assembly. Mine never tried to do that, but I think it would be a safe precaution.
10. Remove the other 2 plated screws from the front of the camera. This will release the shutter assembly and light box (for want of a better name) from the frame. Slide it out sideways.
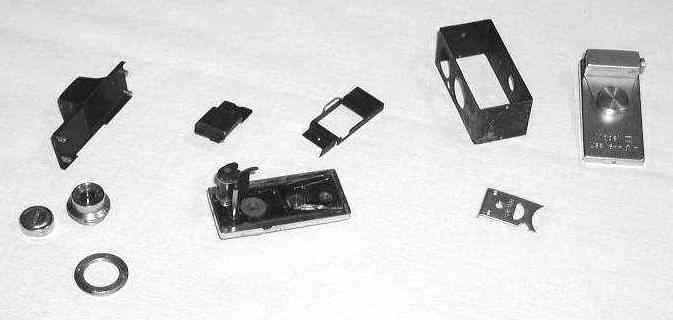
That's it. You now have your Steky apart and ready for a good clean-up and whatever else you were wanting to do before you started this disassembly.
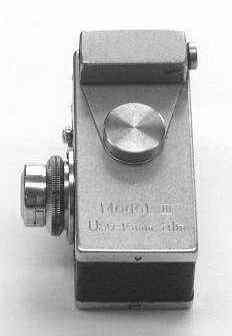
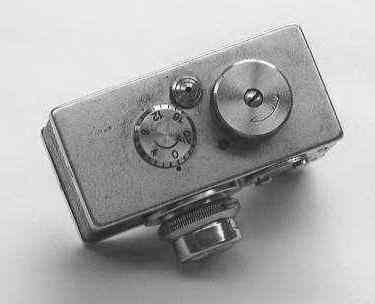
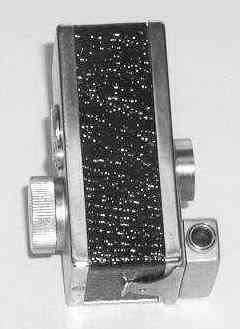
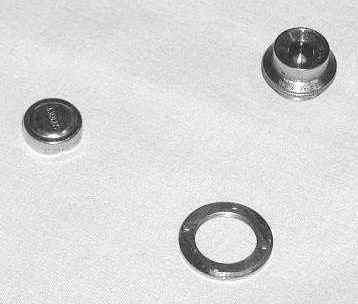
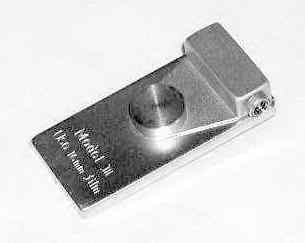
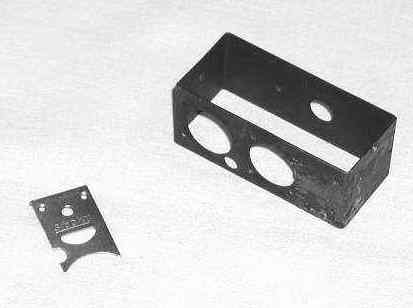
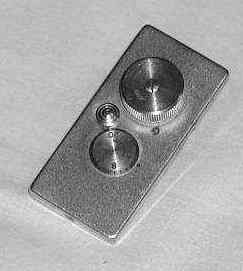
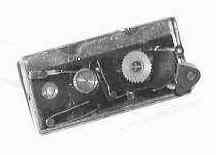
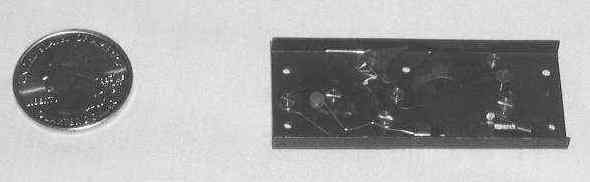
Here are some pictures to help:
Reassembly:
Assembly is in reverse order. There are three kinds of screws. The 4 chrome screws in the front are longer and have slightly rounded heads. They must be long enough to go through the shutter speed window, the camera frame and into the shutter assembly plate. Also, the lens ring screws are chrome and slightly longer. The rest of the screws are short and black.
I visited an old shoe store in downtown Birmingham and explained my insanity and the need for some thin, textured leather to the nice lady there. She grabbed a stool and said, "Follow me." She directed me to an enormous box of leather and told me to help myself. On my first grab I pulled out a foot square piece of leather that was so much like the original paper/leather that it scared me! I cut a strip of it exactly .700 inches wide and glued it in place after assembly. It takes a strip about 5 inches long. The glue I used is 3M Super Weatherstrip Adhesive #08001, which is available at almost all auto parts stores.
Final thoughts:
The whole reason I took mine apart was the sound of the shutter speeds. When I went from 25 to 50 to 100, there seemed little difference in the sound. Upon disassembly, I saw there was no real way to adjust anything. The shutter "hammer" is shot with a spiral spring. You can bend it one way and another, but it makes little difference in the time. I finally gave up and sent it to a pro repair shop. The owner played with it for a week, on and off, and finally came to this conclusion:
Tightening up the spring will increase the speed a little. Bending it loose will gain little except erratic operation. In the final analysis, mine ended up being 1/80 sec at the 25 mark, 1/100 at the 50 mark and 1/125 at the 100 mark. I suppose with modern color film and its great latitude and using it outdoors most of the time, ASA 100 speed film will do nicely.
Above all, have fun.
Here are a couple of additions from my experience:
1 -- The shutter assembly, once removed from the camera body/shell, is composed of a bunch of tiny parts sandwiched between two outer brass plates. There is nothing holding these two plates, which form a shallow box, together -- the back one with the bulging tube through which the light to the film passes will come off the front with a slight pull, revealing the entire shutter mechanism with is safely mounted on the front plate, nothing to go "sproing!" and all about as complex as a box brownie.
2 -- If you have a flash synch model (IIIB) you will see a pc post on the front of the camera's shutter plate and, on the inside of that plate, the back of the pc plug consisting of a very short post and a small springy thingy that is smacked by a piece of the shutter as it opens. Fire the shutter a few times on "B" and you will see how this works. When the shutter fires it smacks the spring, which hits the center post of the rear of the pc plug, completing the circuit and firing the flash. It is "X" (strobe) synch only.
If your flash does not work, you just have to bend this bit of springy metal around so (a) the bit of shutter hits it and (b) when it does so, the springy thingy is pushed against the center post of the back of the pc plug. Look at it work a few times, you'll see what I'm talking about.
3 -- My shutter was a bit sticky on the allegedly slow speed -- it hung up and wouldn't open all the way. Ditto on "B" so I sprinkled a bit of graphite around the various moving parts (I feel a need to emphasize here that one does not normally sprinkly anything around the inner workings of a camera one cares about, but these are very simple and can only benefit. On the other hand, oil is to be avoided on any and all shutter blades at all costs) and they now work nicely.
Reassembly is easy. I lay all the parts out on a towel as I work, first removed put on the far left corner and so forth, so I know in what order they go back.
4 -- For those recovering their cameras, check the scrap box at a leather shop -- I went to Tandy Leather a bunch of years ago and bought some real Morocco cheap. It looks real nice. The fixative of choice for recovering cameras is contact cement -- that yellow goop you get at the hardware store. It sticks good and you can still peel the leather off to get at screws if you have to.
To return to the main index for the Sub Club click here.
COPYRIGHT @ 1995, 1996, 1997, 1998, 1999, 2000, 2001, 2002, 2003, 2004, 2005 by Joe McGloin. All Rights Reserved.